Playroom Closet Organization

Guys. We have a problem in our home. A way too many toys problem. I don’t even know exactly how we accumulated so much (*cough* grandparents *cough*), but the board games and puzzles and tiny figurines and more and more art supplies have been piling up and I’ve been closing the closet door and choosing not to deal with it.
It was finally time though. The donation truck was scheduled to come which motivated me to start filtering through everything, tossing a ton while evaluating where we needed organization solutions. We have had the Ikea expedit (now called Kallax) cube shelf (found a cheaper one at Target!) in there for awhile now and when I was pregnant and nesting like a madwoman I corralled all of Deac’s characters into these bins from the container store. I bought a few more of the clear bins to accommodate his latest obsessions (RescueBots and Paw Patrol) and moved some things around on the metal shelf we have on one side of the closet to give us more usable space and then got to work. Here are some tips I followed as I reorganized this space.
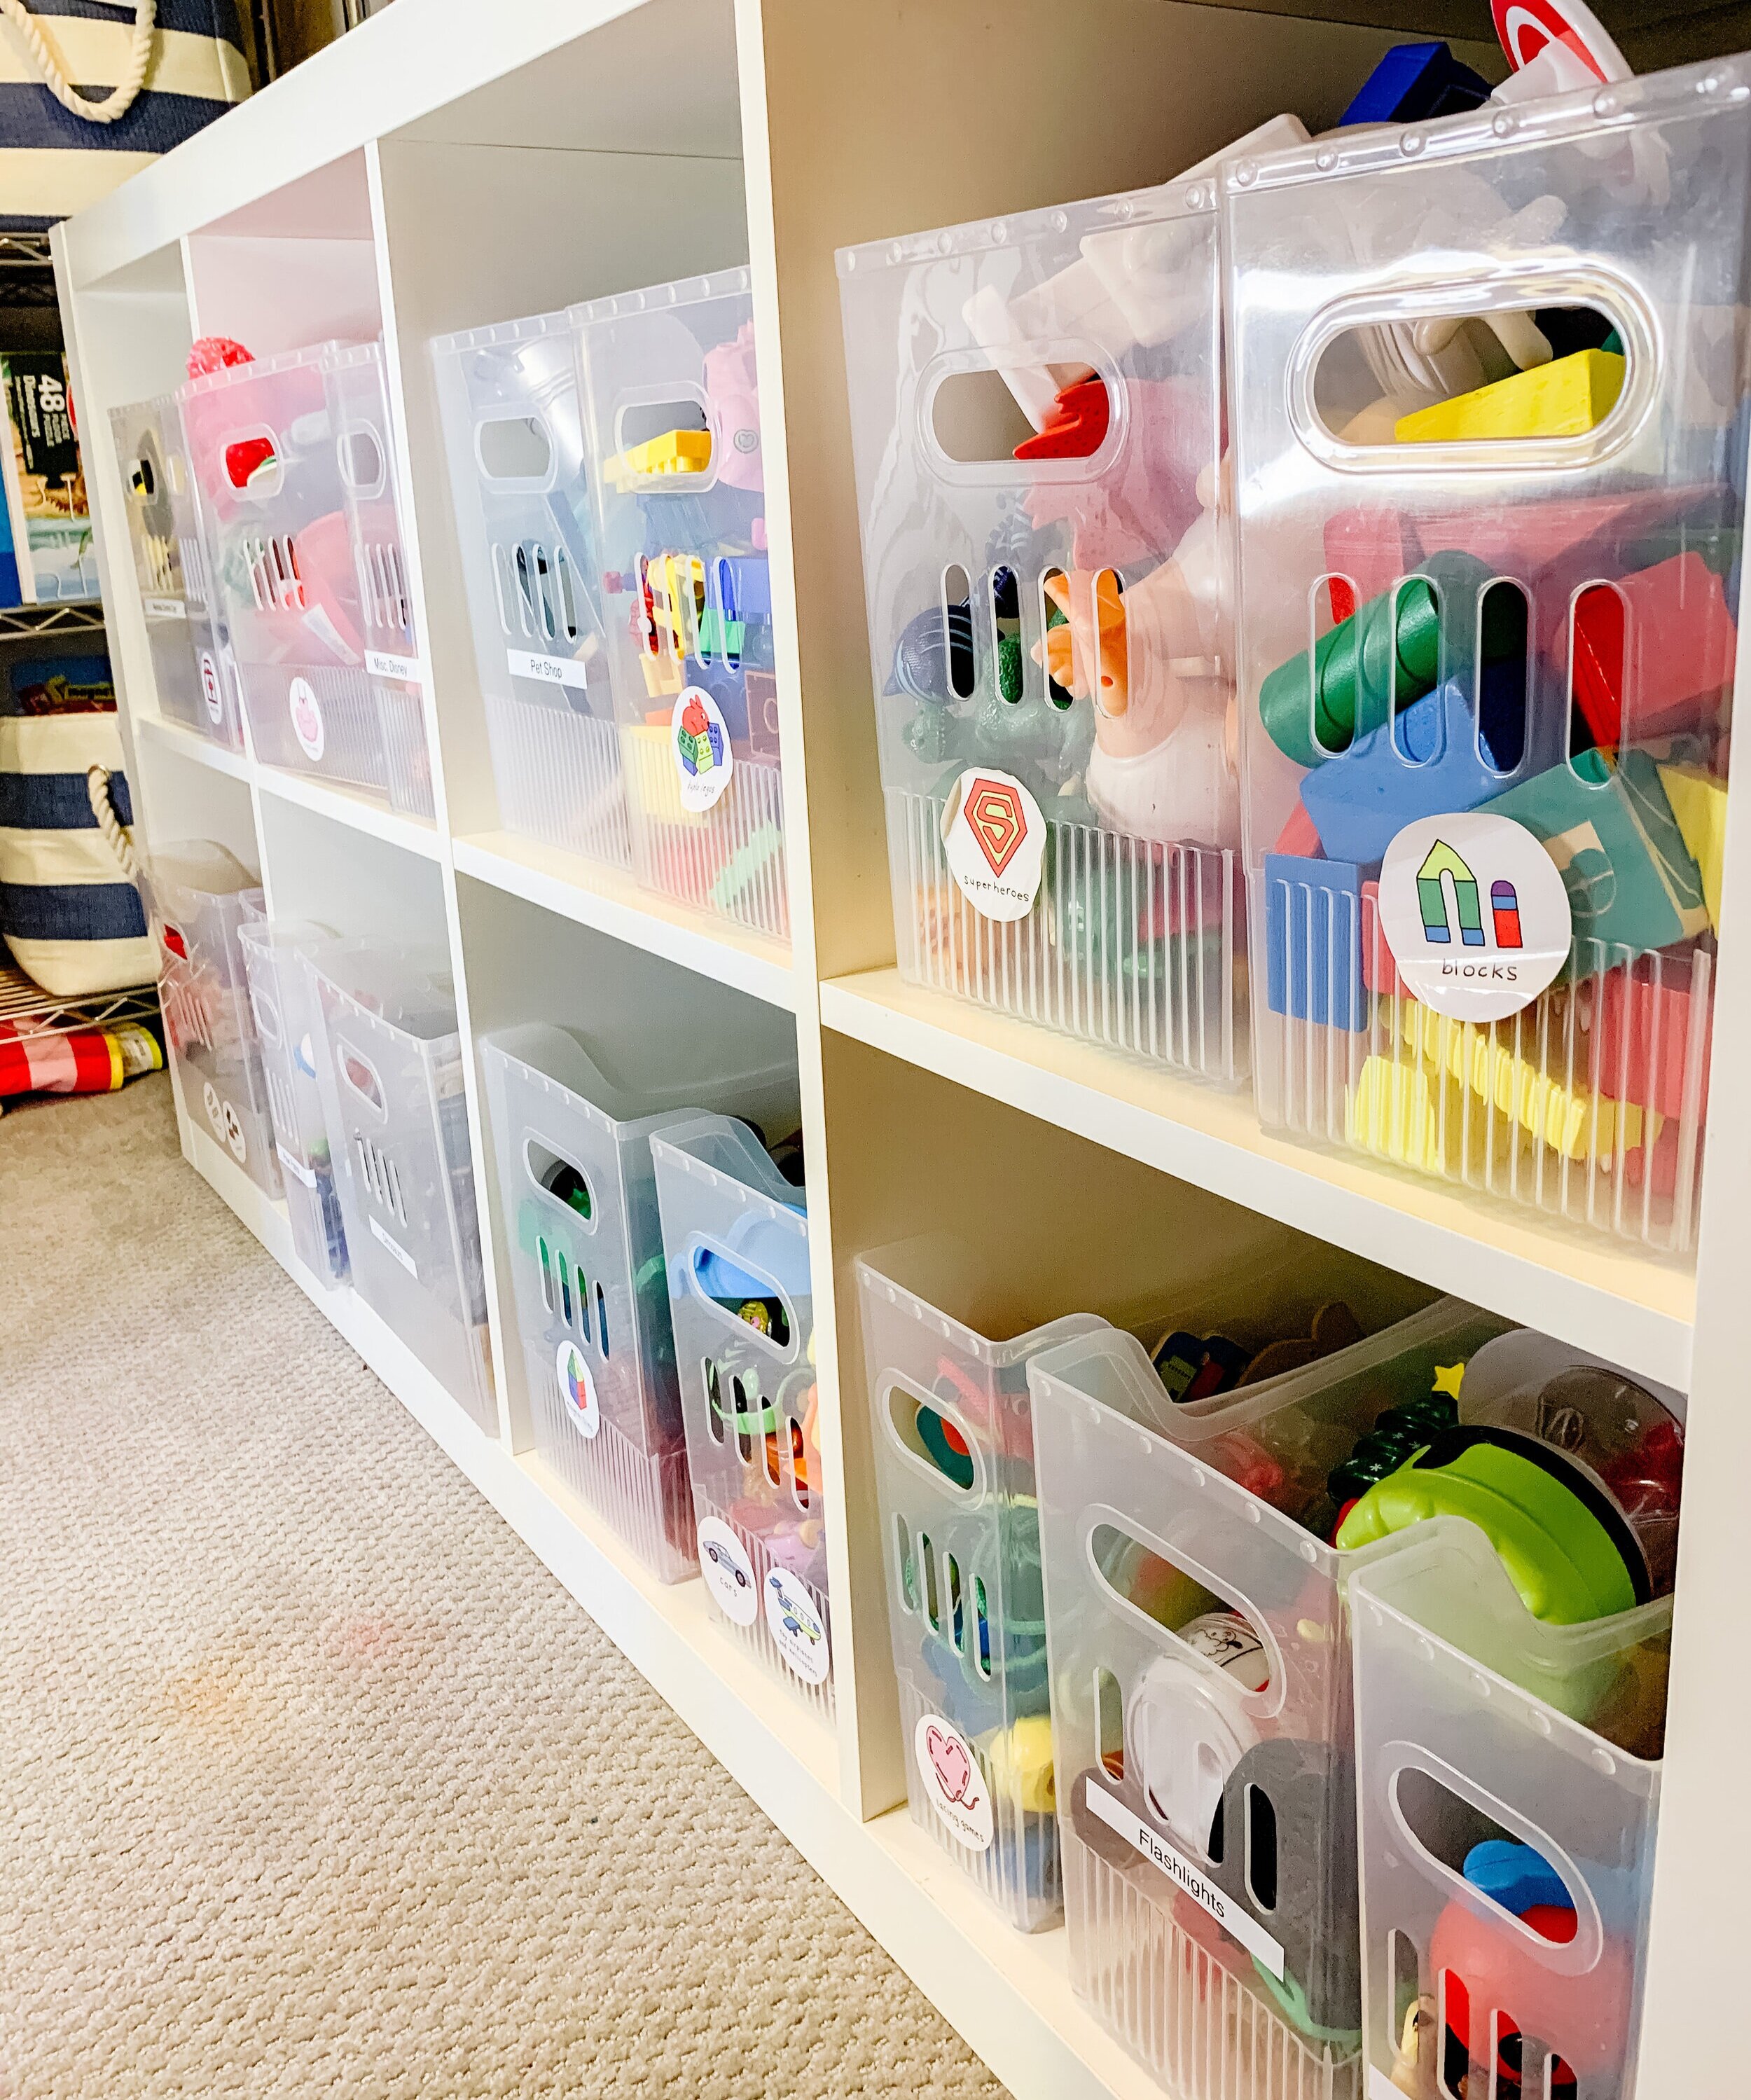
Tip #1: Categorize the Chaos
It may seem silly to have a bin for each category of toy with a label on it that my four year old can’t yet read, but the labels aren’t just for him. They help me, my husband, the babysitter, grandparents, or whomever might be helping clean up, put things back in the correct spot. A particular person in our house (*cough* my husband *cough*) liked to clean up by dumping everything into the closest container and calling it a day. It worked until my son went looking for that one specific guy and had to dump out the entire bin to search for it. I am fully committed to these slender clear bins that come in a wide variety of widths. I like how they can slide next to each other rather than stacking on top of each other. And I like that they’re clear so we can see what is inside which usually prevents dumping in search of one tiny guy. I adore these picture labels from Love Lucy Designs so Deacon can see what goes where (her shop doesn’t have them right now, but I hope she brings them back!). For the categories that didn’t have a matching picture, I just used my good old label maker; her name is Barbara and we’ve been together longer than my husband and me (my version is no longer made, this is cheapest hand-held one I found or this one on Amazon)


Tip #2: Placement Matters
The metal shelf we have on the side of the closet held a few toys, but it also housed rarely used blankets and adult games. I relocated those items to a hall closet allowing for two more shelves of toys. These blue and white bins used to be in Deacon’s nursery and now house larger items like stuffed animals, instruments, balls, and magnetic boards and toys (I love how these labels slide easily on them for labeling (see Tip #1)). They used to sit along the top of the white shelf, but I moved them to the metal shelf after realizing how well they fit. I put the most accessed and heavier toys towards the bottom. I didn’t want Deacon trying to lift the heavy instruments down from up high. Now he can just slide them out of the bottom shelf. The puzzles are now stacked nicely and at a level that Deacon can help him self to them. Most importantly, the art supplies are now on the highest shelf. After a crayon-on-wall incident, moving these up and out of reach was a necessity. I love this lazy Susan for crayons, colored pencils, markers and glue because one of the segments comes out so if we don’t want ALL the supplies at that time, I can just pull out the crayons. These magazine folios are great for coloring books, handwriting practice sheets, and art paper. I like that they don’t have an end cap so longer papers can hang out. I also moved our ever-growing collection of playdoh kits and sensory bins up to the very top of the closet where only grownups can reach. Considering who uses what and how frequently helped me decide where re-home the bins and toys.


Tip #3: Go Vertical
Now that the top of the white shelf had been cleared off by moving the blue and white bins, I realized just how much space we had. I considered buying another cube shelf and stacking it on top, but I was really trying to do this with what I had on hand (and TBH, assembling and anchoring another shelf sounded super annoying). I moved several large toys that don’t fit into the clear bins on top of the shelf and hung several large long toys up on the big empty wall. I could have probably used command hooks for most of them, but I was trying to just get it done so I used an assortment of long nails (I might replace them with these labeled hooks because you know I love a label). I tied string around the toys that didn’t have hanging holes and hung them on the nails. I also took advantage of empty vertical space by using these under the cabinet shelves on the other side of the closet. Lining up most of the board games vertically means we can slide them out easily instead of having a whole tower collapse on top of us when they’re stacked horizontally. Moving things up on the wall and taking advantage of unused space under shelves made such a difference!
Do you have any tips for toy storage that I could incorporate? Check out my Instastories today to see what I was working with before. Our solutions still aren’t perfect, but gosh it looks much better than it did before!
Shop this post

